Best AirPods Settings for iPhone in 2026 (Fix Switching, Boost Sound, Better Calls)
If your AirPods sound “fine” but not great… you’re probably one toggle away from a noticeably better experience.
The truth is most people never touch the newer AirPods settings iPhone options Apple has quietly added—especially the 2026 updates that fix annoying device switching, improve call clarity, and make Adaptive Audio actually feel “smart.”
Below are the exact settings I’d change on any iPhone in 2026 (iOS 26 and newer), plus model-specific tips for AirPods Pro 3, AirPods Pro 2, and AirPods 4 (ANC).
Quick answer (best AirPods settings on iPhone in 2026)
For the best results in 2026, open Settings → your AirPods and turn on Adaptive Audio (then adjust the slider), enable Conversation Awareness, set Microphone to a consistent ear if calls are flaky, and use Headphone Accommodations to “EQ” your sound. On iOS 26, also enable Keep Audio with Headphones to stop unwanted switching.
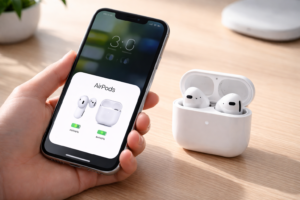
Before you start: how to find your AirPods settings on iPhone
Apple hides the best controls behind one tiny menu.
- Put your AirPods in your ears (or open the case near your iPhone).
- Go to Settings.
- Tap your AirPods name near the top (e.g., “John’s AirPods Pro”).
If you don’t see them there, go to Settings → Bluetooth → (i) next to your AirPods.
The best AirPods settings for iPhone in 2026 (step-by-step)
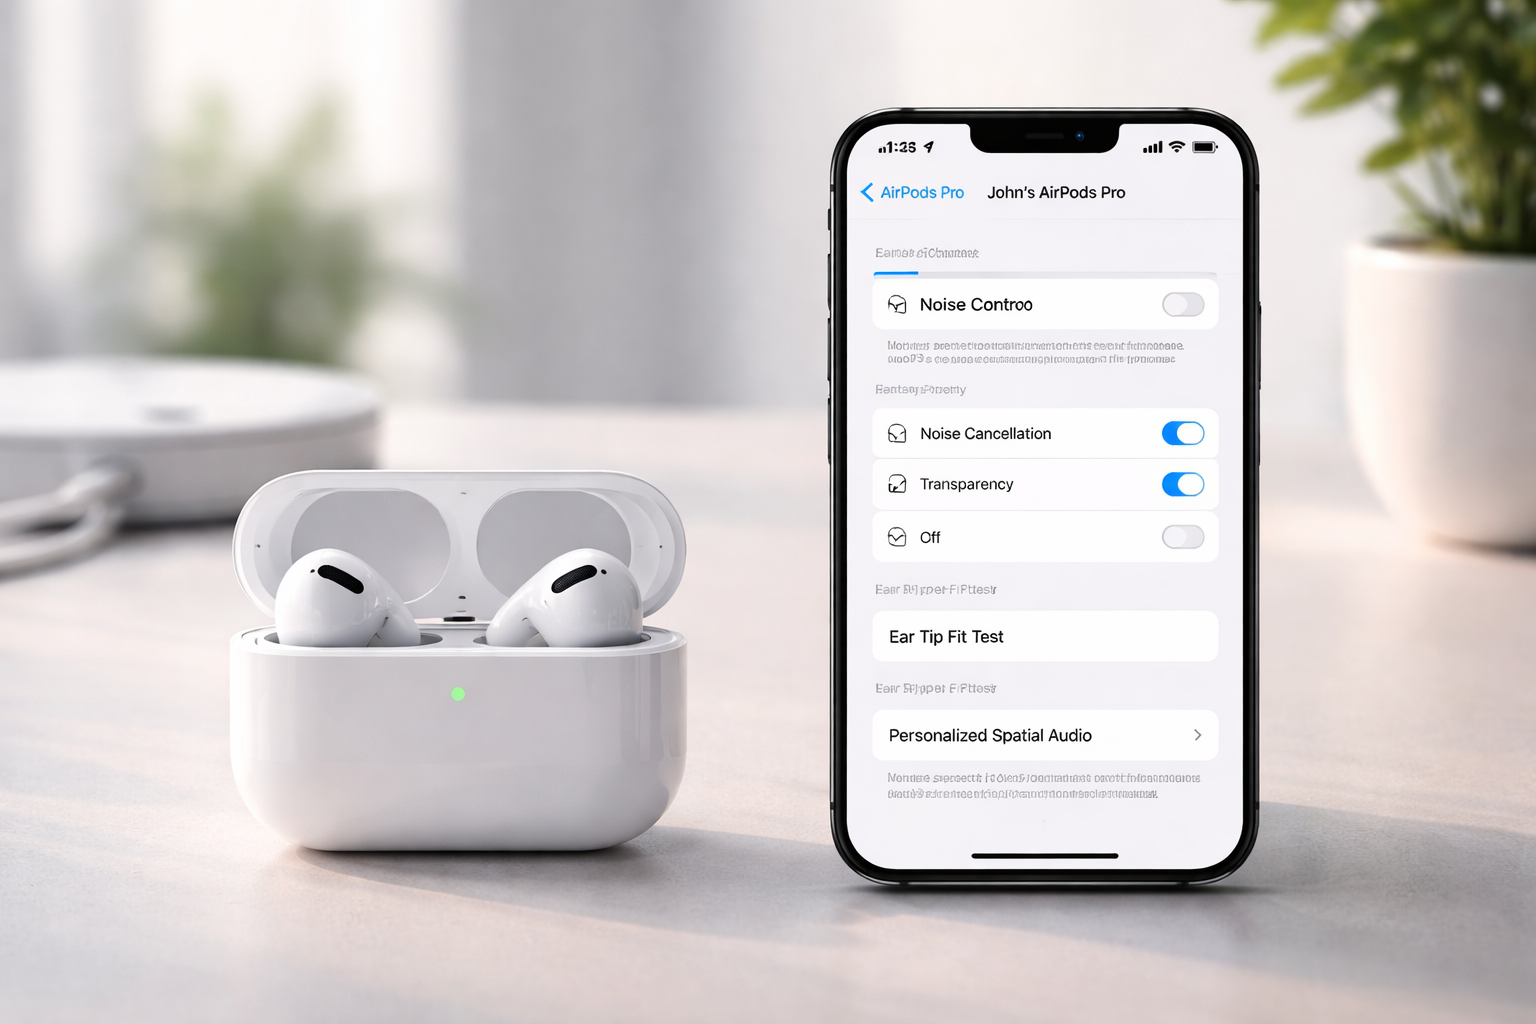
1) Adaptive Audio: set it once and it feels like an upgrade
Adaptive Audio is one of those features that sounds like marketing… until you tune it. In 2026, it’s still the fastest way to optimize AirPods for real life because it blends Noise Cancellation and Transparency based on your environment.
Best setting: Use Adaptive Audio, then adjust the “Less Noise ↔ More Noise” balance.
- Go to Settings → AirPods
- Tap Adaptive Audio (or find the Adaptive section)
- Move the slider:
- Less Noise = more focus (cafes, commuting, open offices)
- More Noise = more awareness (walking outside, airports, announcements)
My real-world rule: If you keep taking one earbud out to hear people, you’re too far toward “Less Noise.” If you keep turning your volume up, you’re too far toward “More Noise.”
2) Conversation Awareness: the setting that stops you from shouting
If you’ve ever started talking and your music keeps blasting… this fixes it. Conversation Awareness automatically lowers your media volume and emphasizes voices when you speak.
- Go to Settings → AirPods
- Toggle Conversation Awareness ON
Best settings use cases: office, home, coffee shops, picking up quick orders, checking out at stores.
When to turn it OFF: workouts or situations where you talk to yourself (yes, it happens) or sing along—some people find it triggers too easily.
3) Voice Isolation (calls): make your voice sound “closer” instantly
Call quality is where AirPods can feel wildly different depending on settings. In 2026, Voice Isolation is the fastest win for clearer calls—especially in wind, traffic, gyms, or busy rooms.
How to enable Voice Isolation during a call:
- While on a call, open Control Center
- Tap Mic Mode
- Select Voice Isolation
Best setting: Keep Voice Isolation on for work calls and commuting. If you want the room ambience (rare), switch back to Standard.
4) “Keep Audio with Headphones” (iOS 26): stop the annoying auto-switching
This is the 2026 feature I wish existed years ago. If your AirPods keep “jumping” to your iPad, Mac, Apple TV, or some random device at the worst time—turn this on.
- Go to Settings → General → AirPlay & Continuity
- Enable Keep Audio with Headphones
Why it matters: It prevents your audio session from being hijacked when another Apple device wakes up and thinks it deserves your AirPods more than your iPhone does.
5) Press-and-hold controls: set them per ear (this is the “power user” move)
Most people leave controls on default and then complain they can’t quickly switch modes. You can configure each earbud to do different things.
- Go to Settings → AirPods
- Find Press and Hold AirPods (or similar control section)
- Set Left and Right to what you actually use:
- Noise Control (cycle through ANC/Transparency/Adaptive)
- Siri
Best setup for most people:
- Left: Noise Control (so you can switch modes fast)
- Right: Siri (hands-free texts/timers) or Noise Control if you never use Siri
6) Headphone Accommodations: the “EQ” Apple doesn’t call an EQ
If you want richer vocals, clearer podcasts, or less harsh treble, this is the best no-cost upgrade. Headphone Accommodations works across AirPods models and can meaningfully improve perceived clarity.
- Go to Settings → Accessibility → Audio & Visual
- Tap Headphone Accommodations
- Turn it ON
- Tap Custom Audio Setup and follow the prompts
Best setting tip: If music feels thin or podcasts feel muffled, run Custom Audio Setup again in a quiet room. A 2-minute redo often fixes what people assume is “just how AirPods sound.”
7) Custom Transparency Mode: make it natural (or super focused)
Transparency can be amazing—or weirdly loud and hissy—depending on how it’s tuned. With Headphone Accommodations, you can shape Transparency to match your environment.
Where it lives:
- Settings → Accessibility → Audio & Visual → Headphone Accommodations
Look for options like:
- Amplification (how much outside sound is boosted)
- Balance (left/right)
- Tone (brighter vs warmer)
- Ambient Noise Reduction (reduces constant hum)
- Own Voice (how much of your voice you hear)
Best settings guidance:
- If Transparency feels “too intense,” reduce Amplification and enable Ambient Noise Reduction.
- If voices are hard to understand, adjust Tone toward clearer speech (often slightly brighter).
- If you hate hearing yourself, reduce Own Voice.
8) Personalized Spatial Audio: worth it if you watch movies or use Apple Music
Spatial Audio can be either “wow” or “why does this sound distant?” Personalization is what makes it click for most people.
- Go to Settings → AirPods
- Tap Spatial Audio
- Select Personalize Spatial Audio and complete the scan
Best settings tip: If Spatial Audio makes vocals feel far away, try turning off head tracking (or switch to fixed). It’s personal preference, not a “right” answer.
9) Microphone selection: stop the “one AirPod sounds bad on calls” problem
By default, AirPods can automatically switch microphones. That’s convenient… until one side has wind noise, a slightly weaker fit, or a dirty mic grille.
- Go to Settings → AirPods
- Tap Microphone
- Choose:
- Always Left AirPod or Always Right AirPod (more consistent)
- Or keep Automatic if you never notice issues
Best setting: If coworkers say you “fade in and out,” pick the side that sits more securely in your ear and set it to Always Left/Right.
10) Personalized Volume: great for daily use, not great for “control freaks”
Personalized Volume adjusts your listening level based on environment and habits. Some people love it. Some people feel like their AirPods are “changing volume on their own.” Both reactions are valid.
- Go to Settings → AirPods
- Toggle Personalized Volume ON if you want set-and-forget comfort
Best setting: Turn it on if you’re constantly adjusting volume while commuting. Turn it off if you do audio work or want a consistent level.
11) Loud Sound Reduction: turn it off if you want full dynamics (especially in Transparency)
Loud Sound Reduction can make things feel “safer” but also a bit flatter. If you’re trying to get the most natural sound (and you’re listening at reasonable levels), consider turning it off.
- Go to Settings → Accessibility → AirPods (or relevant Accessibility audio menu)
- Find Loud Sound Reduction
- Toggle it OFF for a more natural, full-range experience
Note: If you listen loud, keep protection features on. Your ears don’t get a replacement program.
Best AirPods configuration by scenario (copy these)
Best settings for commuting (train/bus/city)
- Noise Control: Adaptive Audio (slider toward Less Noise)
- Conversation Awareness: ON
- Voice Isolation: ON for calls
- Keep Audio with Headphones (iOS 26): ON
Best settings for office + meetings
- Noise Control: Adaptive Audio (middle) or ANC
- Headphone Accommodations: ON (clarity boost)
- Microphone: Always Left/Right (whichever is more stable)
- Voice Isolation: ON (Control Center during calls)
Best settings for workouts
- Noise Control: Transparency or Adaptive (toward More Noise for safety)
- Conversation Awareness: OFF (optional—many prefer it off)
- Press-and-hold: Noise Control cycling (quick changes with sweaty hands)
Best settings for movies and immersive audio
- Personalized Spatial Audio: ON
- Head tracking: Try both (pick what feels natural)
- Headphone Accommodations: Light tuning only (don’t overdo it)
Which AirPods should you buy in 2026? (quick comparison)
If you’re tweaking settings because your current pair isn’t quite cutting it, here’s the honest breakdown. These are the models most people compare when shopping right now.
AirPods Pro 3 (best overall in 2026)
- Pros: Best Adaptive/Custom modes, strongest call performance, top-tier noise control
- Cons: Higher price
- Best for: commuters, frequent callers, anyone who lives in ANC
- Typical price range (2026 estimates): $249–$279
If you already spent premium money on AirPods Pro 3: don’t leave them on default. The settings above genuinely make them feel “worth it.”
AirPods 4 (ANC) (best value if you want noise cancellation)
- Pros: More affordable ANC, modern modes, great everyday use
- Cons: Less premium fit/feel than Pro line for some ears
- Best for: casual users who still want ANC and newer features
- Typical price range (2026 estimates): $179–$199
AirPods Pro 2 (still a smart buy if discounted)
- Pros: Proven reliability, strong feature set, still supported well
- Cons: Older than Pro 3
- Best for: shoppers looking for Pro features at a lower price
Who should buy what?
- If you take calls daily and travel a lot: AirPods Pro 3.
- If you want modern features without the top-tier price: AirPods 4 (ANC).
- If you find a great deal and want “Pro” performance: AirPods Pro 2.
- If you’re often in noisy places: avoid non-ANC models—you’ll just crank volume and get frustrated.
Shopping tip: If you’re considering upgrading, check today’s pricing for AirPods Pro 3 and AirPods 4 (ANC)—discounts come and go fast, and the right deal often makes the decision for you.
Buyer guidance: how to choose the best settings without overthinking
Here’s the simplest way to lock in your AirPods configuration in under 5 minutes.
If you want the “best sound quality”
- Turn on Headphone Accommodations + run Custom Audio Setup
- Set Adaptive Audio to the middle, then adjust after one commute
- Set up Personalized Spatial Audio if you listen to Spatial mixes
If you want the “best noise control”
- Use Adaptive Audio slider toward Less Noise
- Customize Press-and-hold to cycle Noise Control modes quickly
- Fine-tune Custom Transparency so awareness doesn’t feel harsh
If you want the “best call quality”
- Use Voice Isolation during calls
- Set Microphone to Always Left/Right if your voice cuts out
- Turn on Keep Audio with Headphones (iOS 26) so calls don’t jump devices
FAQs: AirPods settings on iPhone (2026)
What is the best Adaptive Audio setting for AirPods on iPhone?
Set Adaptive Audio based on your environment: slide toward Less Noise for focus (commuting, office) and toward More Noise for awareness (walking outside, airports). You can adjust it in Settings → AirPods → Adaptive Audio.
How do I enable Voice Isolation on AirPods calls?
During a call, open Control Center, tap Mic Mode, then choose Voice Isolation. It’s supported on models like AirPods Pro 2/3 and AirPods 4.
How do I stop AirPods from switching devices automatically?
On iOS 26, enable Keep Audio with Headphones in Settings → General → AirPlay & Continuity. You can also manually manage automatic switching behavior in your AirPods Bluetooth options if needed.
What’s the best way to customize AirPods sound like an EQ?
Use Headphone Accommodations in Settings → Accessibility → Audio & Visual, then run Custom Audio Setup. It’s the most effective “best settings” tweak for clearer sound without extra apps.
What does Conversation Awareness do?
Conversation Awareness lowers your media volume and enhances voices when you start speaking. Toggle it in Settings → AirPods.
How do I set up Personalized Spatial Audio?
Go to Settings → AirPods → Spatial Audio → Personalize Spatial Audio, then follow the scan steps. It usually improves the “center” and realism of Spatial Audio.
Which AirPods microphone setting is best for calls?
If call quality is inconsistent, set Microphone to Always Left AirPod or Always Right AirPod in Settings → AirPods. Pick the earbud that fits you best and stays most stable.
Should I turn off Loud Sound Reduction?
If you want fuller dynamics and a more natural Transparency experience, yes—turn it off in Accessibility settings. If you listen loudly or are sensitive to sharp sounds, leave it on.
Conclusion: the “best settings” are the ones you’ll actually use
If you only change three things from this guide, do these:
- Adaptive Audio + slider tuning (biggest everyday improvement)
- Headphone Accommodations (Custom Audio Setup) (best sound upgrade without buying anything)
- Keep Audio with Headphones (iOS 26) (finally stops the annoying switching)
Want the quickest win right now? Update to iOS 26, turn on Keep Audio with Headphones, then test Voice Isolation on your next call. If you’re still not happy with noise control or call quality after optimizing, it may be time to consider an upgrade—AirPods Pro 3 is the easiest “set it and forget it” option for 2026, while AirPods 4 (ANC) is the value pick.